How to Remove Rust from Bathroom Light Fixture? Expert Tips
How to remove rust from bathroom light fixture? To remove rust from a bathroom light fixture, mix baking soda with water to form a paste. Apply it to the rusted area, let it sit for 15–30 minutes, then scrub gently with a soft brush or cloth. Rinse and dry thoroughly. Use vinegar for tougher rust spots.
You’re not alone—many homeowners face this frustrating issue, especially in spaces where moisture is prevalent. But don’t worry; there are effective ways to tackle rust and restore your fixtures to their former glory. Imagine walking into your bathroom and being greeted by a gleaming, spotless light fixture.
Sounds appealing, right? Stick around to discover simple yet powerful methods to remove rust and keep your bathroom looking fresh and clean.

Credit: www.youtube.com
How to Remove Rust from Bathroom Light Fixture?
Identifying Rust On Light Fixtures
Rust can silently invade your bathroom light fixtures. Identifying it early can prevent further damage. Rust makes metal look old and worn. It affects the fixture’s appearance and function.
Spotting rust early can help maintain your bathroom’s charm. Examine your light fixtures regularly. Look for any changes or discoloration. Knowing what to look for is vital.
Signs Of Rust On Light Fixtures
Rust appears as reddish-brown spots. It can spread over time. Check for rough textures on the metal. Feel the surface with your fingers.
Common Areas Affected By Rust
Metal parts are prone to rust. Look at screws and brackets closely. Edges of the fixture often show rust first. Inspect these areas carefully.
Why Rust Forms On Light Fixtures
Moisture is the main cause of rust. Bathrooms are damp places. Metal reacts with air and water. This reaction creates rust.
Impact Of Rust On Fixture Functionality
Rust weakens the metal. It can cause parts to break. The fixture might not work properly. Rust can also affect the light quality.
Visual Cues To Identify Rust
Discoloration is a common sign. Look for patches of brown or red. Check for flaky or powdery textures. These are signs of rust.

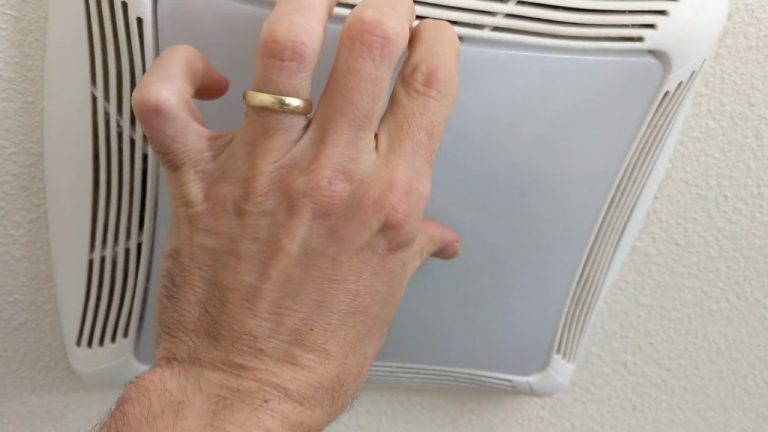
Credit: www.reddit.com
Necessary Tools And Materials
Removing rust from a bathroom light fixture requires the right tools and materials. This ensures a smooth process and successful results. Knowing what you need saves time and effort.
Tools Required
Start with basic tools. A screwdriver helps remove the light fixture safely. Use a wire brush for scrubbing rust away. Fine-grit sandpaper smooths out rough spots. Don’t forget a soft cloth for cleaning.
Materials Needed
Gather effective materials. White vinegar works well for rust removal. Baking soda is a natural cleaner. Lemon juice also helps with rust. Use a rust remover for stubborn areas. Always have a bucket of water nearby.
Safety Equipment
Safety matters. Wear rubber gloves to protect your skin. Goggles keep rust particles away from your eyes. A dust mask helps while sanding.
Optional Extras
Some extras can enhance the process. Use a toothbrush for detailed cleaning. A small container can hold your cleaning solution. Consider a rust-preventive spray for future protection.
Safety Precautions
Ensure safety first by turning off electricity before cleaning. Use gloves and a mask to protect skin and lungs. Ventilate the area well to avoid inhaling fumes from rust removers.
Dealing with rust on your bathroom light fixture might seem like a straightforward task, but it’s essential to approach it with caution. Safety should always be your top priority, especially when working with any electrical fixtures. Before you dive into the cleaning process, take a moment to ensure you’re taking the necessary precautions to protect yourself and your home.
Turn Off The Power
Begin by switching off the power supply to your bathroom light fixture. You can do this by turning off the circuit breaker that controls the bathroom lights. This step is crucial to avoid any risk of electric shock while you’re working on removing the rust.
Wear Protective Gear
Put on rubber gloves to protect your hands from any harsh cleaning agents. If you’re using a rust remover, safety goggles are also a good idea to prevent any splashes from getting into your eyes. Consider wearing a mask if you’re sensitive to strong smells.
Ensure Proper Ventilation
Open a window or turn on a fan to ensure your bathroom is well-ventilated. Many rust removers contain chemicals that can produce strong fumes. Good airflow will help minimize your exposure and keep the air fresh.
Test Cleaning Products
Before applying any cleaning product to the entire fixture, test it on a small, inconspicuous area. This helps ensure that the product won’t damage the finish of your light fixture. Check the manufacturer’s instructions for recommended cleaning agents.
Use Non-abrasive Tools
Choose a soft cloth or sponge for cleaning. Avoid using steel wool or abrasive pads, which can scratch the surface of your light fixture. If the rust is stubborn, a gentle brush can be used with care.
Be Mindful Of Water Exposure
Keep your cleaning process as dry as possible. Excessive moisture can lead to additional rusting or electrical hazards. Use minimal water and dry the fixture thoroughly after cleaning.
Consider Professional Help
If at any point you feel unsure about handling the rust removal yourself, consider contacting a professional. It’s better to be safe and ensure the task is done correctly than to risk injury or damage. By taking these safety precautions, you can confidently tackle rust removal from your bathroom light fixture. Have you ever had a mishap while cleaning fixtures? How did you handle it? Share your experiences below!
Step-by-step Rust Removal
Rust on bathroom light fixtures is unsightly and can affect their functionality. Removing rust can seem daunting but it’s manageable with the right steps. Follow this step-by-step guide to restore your fixture’s shine.
Gather Your Supplies
Start by collecting necessary supplies. You will need white vinegar, baking soda, aluminum foil, a soft cloth, and protective gloves. These items are easy to find and effective against rust.
Turn Off Power
Safety first. Ensure the power to the light fixture is off. This prevents any risk of electric shock during the cleaning process.
Remove The Fixture
Carefully remove the light fixture from the wall or ceiling. Follow the manufacturer’s instructions to avoid damage. This makes cleaning easier and more thorough.
Soak In Vinegar
Place the fixture in a bowl filled with white vinegar. Let it soak for at least an hour. Vinegar breaks down rust particles effectively.
Scrub With Baking Soda
Create a paste using baking soda and water. Apply it to the rusted areas. Gently scrub with a soft cloth. This helps lift remaining rust residues.
Use Aluminum Foil
For stubborn rust, use crumpled aluminum foil. Dip it in vinegar and gently scrub the rust. This technique is gentle yet effective.
Rinse And Dry
Rinse the fixture with clean water. Make sure all vinegar and baking soda are removed. Dry thoroughly with a soft cloth to prevent new rust from forming.
Reinstall The Fixture
Once dry, reinstall the light fixture. Double-check that everything is secure. Ensure the power is back on and test the light.
Following these steps will help keep your bathroom light fixtures rust-free and sparkling.
Preventing Future Rust
Removing rust from bathroom light fixtures helps prevent future damage. Start by gently scrubbing with a vinegar-soaked cloth. For stubborn spots, apply baking soda paste and rinse thoroughly. Regular maintenance keeps fixtures rust-free.
Preventing Future RustOnce you’ve successfully removed rust from your bathroom light fixture, it’s crucial to keep it at bay. Rust not only affects the appearance but can also damage the fixture over time. By taking a few simple steps, you can prevent rust from making a comeback.
Ensure Proper Ventilation
Humidity is a major culprit in rust formation. Make sure your bathroom is well-ventilated to reduce moisture. Using an exhaust fan during and after showers can help. You might also consider keeping a window slightly open if privacy permits.
Regular Cleaning
Routine cleaning can prevent rust from forming. Dust and wipe your light fixtures regularly using a dry cloth. Avoid harsh chemicals that might strip protective coatings. Instead, use mild detergents if needed.
Apply Protective Coatings
Consider applying a clear protective sealant to your light fixtures. This can shield the metal from moisture and air exposure. Products like rust-resistant sprays can be easily found in hardware stores and are simple to apply.
Choose Rust-resistant Materials
If you’re considering an upgrade, opt for fixtures made from rust-resistant materials. Stainless steel or brass are great choices. They might be slightly more expensive but think of them as an investment in rust-free peace of mind.
Inspect Regularly
Make it a habit to inspect your fixtures every few months. Look for early signs of rust or wear. Catching rust early can make it easier to manage and prevent spreading. Are you using any of these methods to protect your fixtures? What changes have you noticed? Share your thoughts and experiences in the comments below. Your insights could help someone else maintain a rust-free bathroom too!

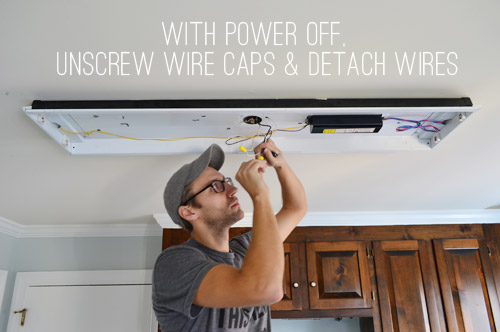
Credit: www.reddit.com
Frequently Asked Questions
What Tools Can Remove Rust From Light Fixtures?
Use sandpaper or a wire brush. Vinegar and baking soda work well for cleaning rust too.
Can Vinegar Effectively Clean Rust Off Bathroom Fixtures?
Yes, vinegar dissolves rust. Soak a cloth in vinegar and wrap it around the rusty area.
How Often Should I Clean Rust From Fixtures?
Check monthly for rust. Clean immediately if you see any rust forming. Regular maintenance prevents damage.
Conclusion
Rust on bathroom light fixtures can ruin their look. Regular cleaning prevents this. Use simple home remedies for rust removal. Baking soda and vinegar work well. They are safe and effective. Always dry the fixture after cleaning. This stops rust from forming again.
Inspect fixtures regularly for any signs of rust. Early action is easier. Keeping your bathroom fixtures rust-free enhances their lifespan. Also, it maintains a clean appearance. With these tips, enjoy a sparkling bathroom light fixture. Happy cleaning!
Read More