How to Create Lut in Light Room Classic: Ultimate Guide
How to create lut in light room classic? To create a LUT in Lightroom Classic, edit your photo, then go to File > Export with Preset > Export to Profile. In the export dialog, select “Export to Cube” to generate a LUT. You can use this LUT in compatible software like Premiere Pro or Photoshop.
Creating a LUT (Look-Up Table) in Lightroom Classic can transform your photos from ordinary to extraordinary. You don’t need to be a professional photographer to master this art; all it takes is a bit of creativity and the right guidance.
In this guide, we’ll walk you through the simple steps to create your very own LUT, unlocking a whole new world of possibilities for your images. Stick with us, and by the end of this article, you’ll be equipped with the knowledge to give your photos that professional, polished finish you’ve always dreamed of. Let’s dive in and see how easy it can be to make your photos pop like never before!
How to Create Lut in Light Room Classic
Lut Basics
LUTs, or Look-Up Tables, are essential tools in photo editing. They help photographers change the mood and color of their images quickly. Understanding how to create LUTs in Lightroom Classic is valuable. It allows you to apply consistent styles across your work.
What Is A Lut?
A LUT is like a filter for your photos. It adjusts colors based on specific values. This transformation enhances the image’s appearance. Unlike presets, LUTs can be used across different software.
Why Use Luts?
Consistency is key in photography. LUTs help maintain a uniform style. They save time by applying complex color changes instantly. This feature is perfect for batch editing.
Types Of Luts
There are two main types of LUTs: 1D and 3D. 1D LUTs adjust one color channel at a time. 3D LUTs allow for more advanced color grading. They modify multiple channels simultaneously.
How Luts Work In Lightroom Classic
Lightroom Classic doesn’t support LUTs directly. You need to use third-party plugins or export your edits. This method involves converting Lightroom settings to LUTs.
Steps To Create A Lut In Lightroom Classic
First, make your desired edits in Lightroom. Next, export the image with these edits. Finally, use a plugin to convert the edits to a LUT. This allows you to apply the LUT to other images.
Choosing The Right Lut
Creating a LUT in Lightroom Classic involves selecting colors and tones that enhance your photos. Start by adjusting the hue, saturation, and luminance to achieve desired effects. Export your settings as a custom LUT for consistent visual style across projects.
Choosing the right LUT (Look-Up Table) for your photos in Lightroom Classic can make a significant difference in the final result. A LUT acts like a filter that adjusts colors, tones, and contrasts, transforming your images to achieve the desired mood or style. Picking the right one is crucial to ensure your photos communicate the right message. Let’s dive into how you can select the perfect LUT to enhance your photography.
Understanding Your Style
First, think about what you want your photos to convey. Are you aiming for a cinematic look or a vibrant, colorful vibe? Understanding your style helps narrow down your options. If you’re uncertain, try experimenting with different LUTs to see which one resonates with your vision. This hands-on approach can often lead to unexpected discoveries and inspiration.
Evaluating Image Content
Consider the content of your image. Is it a landscape, portrait, or cityscape? Each type of photo may benefit from different LUTs. For landscapes, you might prefer a LUT that enhances natural tones, while portraits might need something that highlights skin tones and textures. Assessing your image content guides you to choose the LUT that complements rather than overshadows your photo.
Testing And Comparing
It’s crucial to test and compare various LUTs before settling on one. Lightroom Classic makes it easy to apply and switch between LUTs. Try applying different LUTs to the same image and observe the changes. This process allows you to see what works best for your specific needs. Sometimes, a LUT may look great on one photo but not suit another.
Considering Mood And Emotion
The mood and emotion you want to evoke are essential in choosing a LUT. If you’re aiming for a nostalgic feel, a sepia-toned LUT might work wonders. For dramatic effects, a LUT with high contrast can be impactful. Think about the story your photo tells and select a LUT that amplifies that narrative. This ensures your image doesn’t just look good but also communicates effectively.
Seeking Feedback
Don’t hesitate to seek feedback from peers or online photography communities. Sharing your edited images and asking for opinions can provide valuable insights. Sometimes, others can see things you might miss, like subtle color shifts or mood changes. This external perspective can be instrumental in honing your LUT selection skills. Choosing the right LUT can be a game-changer for your photography. What will you experiment with next to elevate your images?
Creating Custom Luts
Creating custom LUTs in Lightroom Classic allows photographers to personalize their editing process. LUTs, or Look-Up Tables, transform and enhance colors in your photos. Developing your own LUTs lets you achieve a distinct visual style. This process can elevate your photography work, making it unique. Follow these steps to create a custom LUT that reflects your creative vision.
Step 1: Edit Your Photo
Start by selecting a photo in Lightroom Classic. Apply your desired edits and adjustments. Focus on color grading and tone adjustments. Ensure the photo matches your desired style.
Step 2: Export The Settings
Once satisfied with the edits, export the settings. Click ‘File’ and select ‘Export’. Choose ‘Export as Catalog’ for your settings.
Step 3: Convert To A Lut
Use a third-party tool to convert your settings to a LUT. Import the exported catalog into the tool. Follow the tool’s instructions to create the LUT.
Step 4: Test The Lut
Import the newly created LUT back into Lightroom. Apply it to a different photo. Check the results and make any necessary adjustments.
Step 5: Save And Share Your Lut
Once satisfied with the LUT, save it for future use. Consider sharing your LUT with others. This can help build your creative community.
Creating custom LUTs enhances your editing experience. Experiment with different styles and settings. Personalize your photography journey.

Credit: tahusa.co
Applying Luts In Lightroom
Applying LUTs in Lightroom Classic can transform your photos dramatically. LUTs, or Look-Up Tables, adjust colors and tones. They add mood and style to your images. Lightroom Classic allows easy application of LUTs. Let’s explore how to do it efficiently.
Understanding Luts In Lightroom Classic
Lightroom uses profiles to apply LUTs. Profiles change the look of your image. They can make colors pop or create a vintage feel. You can find profiles in the Develop module. This is where you adjust your photo settings.
Importing Your Luts
To apply a LUT, you first need to import it. Open the Profile Browser in Lightroom. Click on the ‘Add’ button. Choose the LUT file from your computer. Lightroom will import and save it for future use.
Applying Luts To Your Photos
Once your LUT is imported, applying it is simple. Select the photo you want to edit. Go to the Develop module. Open the Profile Browser again. Choose your LUT from the list. Click on it to apply it to your photo.
Adjusting The Intensity Of Luts
LUTs can sometimes be too strong. Lightroom lets you adjust their intensity. Use the Amount slider under the profile. Move it left to decrease effect. Move it right to increase effect. Find the perfect balance for your photo.
Saving Your Edited Photos
After applying a LUT, save your edits. Click on the ‘Export’ button. Choose your desired settings for saving. Lightroom offers many formats. JPEG is great for sharing online. TIFF is better for high-quality prints.
Troubleshooting Common Issues
Creating a LUT in Lightroom Classic involves adjusting image settings to achieve desired visual effects. Begin by selecting a photo and applying color corrections. Export these settings as a LUT file to use across various projects, ensuring consistent color grading.
Creating a LUT in Lightroom Classic can elevate your photography game, but it’s not uncommon to face hurdles along the way. Whether it’s a technical glitch or a simple oversight, these issues can be frustrating. Here, we’ll address some common problems and provide practical solutions to keep your creative process flowing smoothly.
Problem: Lut Not Appearing In Lightroom
If your LUT doesn’t show up, the issue might be with the file format or location. Ensure that your LUT is saved in the correct format, usually as a .cube file. Check if it’s placed in the right folder within Lightroom’s directory. I once spent hours searching for a missing LUT, only to find it in the wrong folder. Double-checking these details can save a lot of time.
Error: Lut Applying Incorrectly
Does the LUT look different on application? This might be due to mismatch in color profiles. Ensure your image and LUT share the same color space to maintain consistency. Consider using a reference photo to compare results. It helps in spotting discrepancies early and adjusting accordingly.
Issue: Lightroom Crashes On Applying Lut
If Lightroom crashes, it may be due to software bugs or hardware limitations. Ensure your Lightroom is updated to the latest version. Updates often fix bugs and improve compatibility with LUTs. If crashes persist, check system requirements against your hardware. Your computer might need an upgrade to handle complex edits.
Problem: Lut Exporting Incorrectly
When exporting images with LUTs, ensure export settings align with the intended use. Incorrect settings can alter the final look of your images. Review each setting before exporting, especially resolution and format. It’s a small step but crucial for maintaining quality.
Question: Why Is My Lut Failing To Enhance My Photo?
Sometimes, a LUT doesn’t enhance an image as expected. This could be due to the LUT not being suitable for the photo’s lighting or mood. Experiment with different LUTs to find the perfect match. Reflect on your creative vision. Are you trying to achieve a specific look or feel? Matching a LUT to your vision can transform your photos dramatically.
Observation: Workflow Becoming Sluggish
A sluggish workflow can hinder creativity. If Lightroom slows down, try clearing cache or optimizing your catalog. Keep an eye on unnecessary background tasks that might be consuming resources. A streamlined setup can significantly boost efficiency. These insights aim to troubleshoot common issues effectively. Which challenge has been the most persistent in your experience? Solving these problems not only refines your technical skills but also enhances your creative journey.
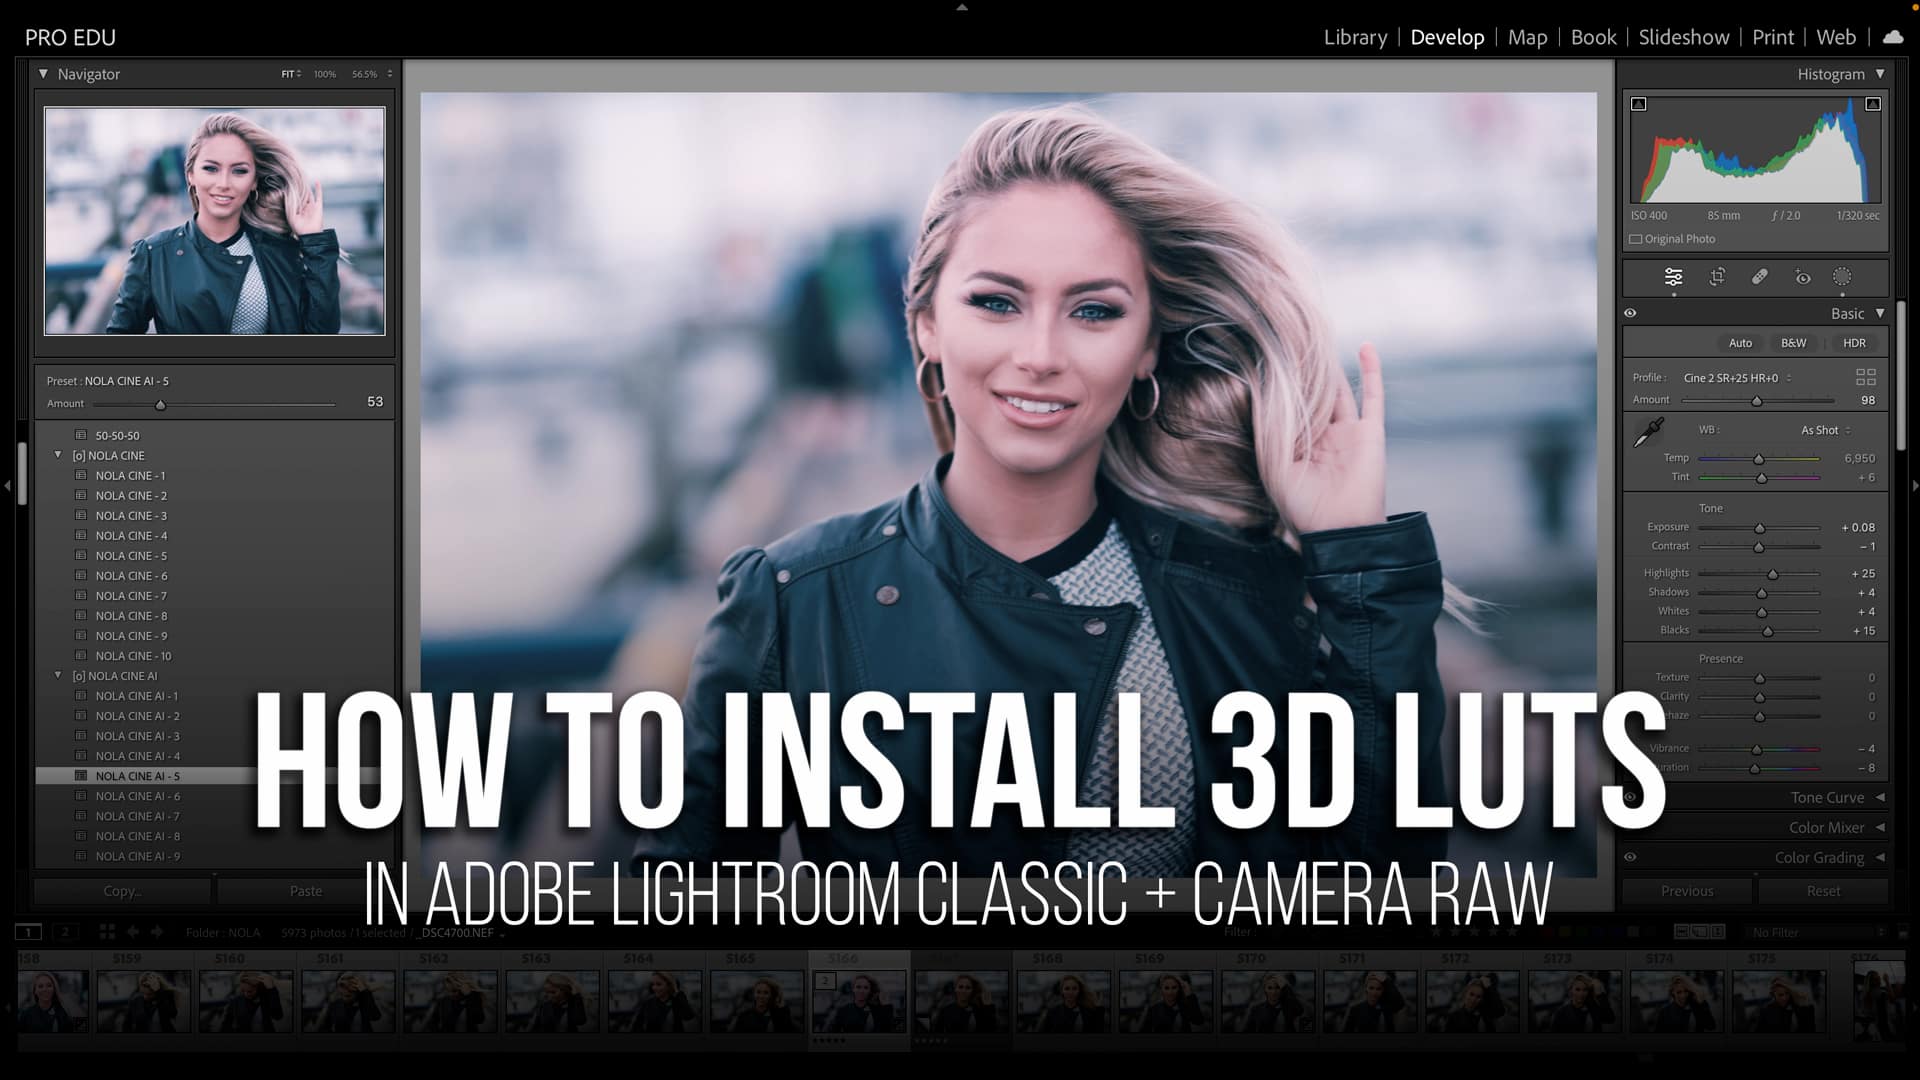
Credit: proedu.com
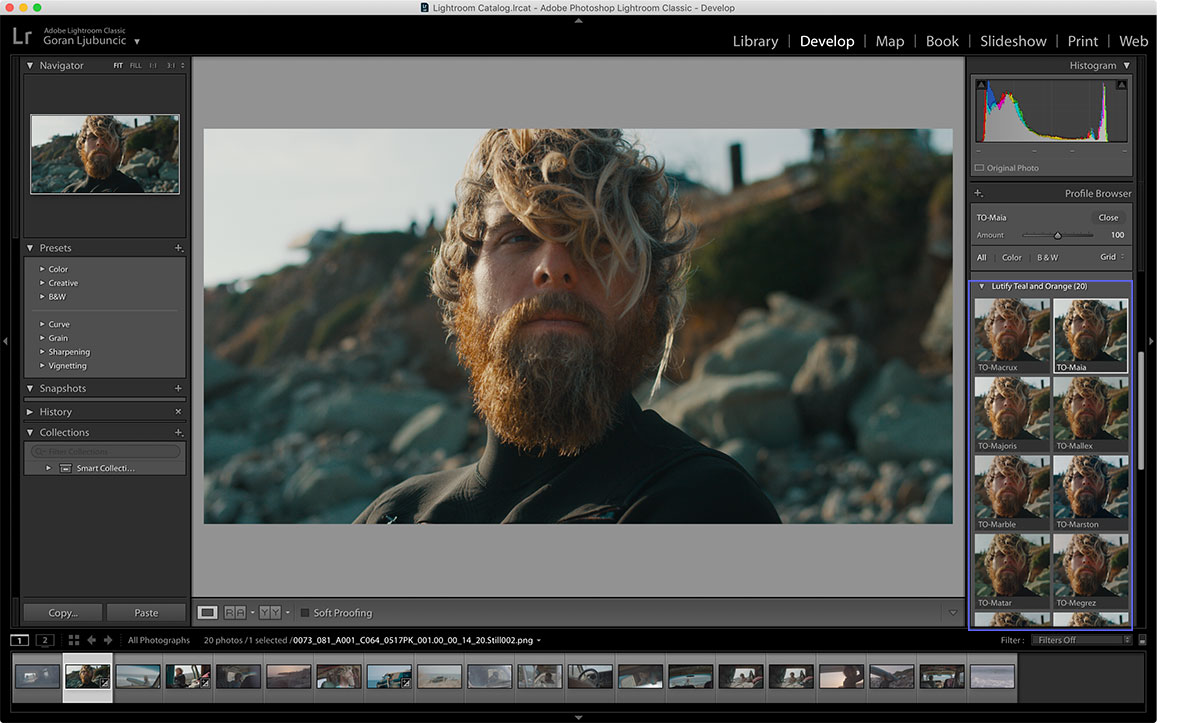
Credit: lutify.me
Frequently Asked Questions
What Is A Lut In Lightroom Classic?
A LUT, or Look-Up Table, is a preset color grading tool. It changes your photo’s colors.
How Do I Create A Lut In Lightroom Classic?
Edit your photo, then export settings as a. cube file. Simple and quick.
Can I Use Luts For All Photo Types?
Yes, you can apply LUTs to any photo. Experiment for unique results.
Conclusion
Creating a LUT in Lightroom Classic is easier than it seems. Follow the steps carefully. Experiment with different settings. Your photos will transform. Save your LUT for future use. Share your creations with others. Improve your editing skills over time.
Enjoy the process of learning. Try new techniques. Grow your creativity. Lightroom offers endless possibilities. Dive in and explore. Practice makes perfect. Keep refining your skills. Happy editing!
Related Article