How to Change Kitchen Light Bulb? Quick & Easy Guide
Have you ever found yourself standing in your kitchen, squinting under dim lighting, wondering how to change that pesky light bulb? You’re not alone!
Changing a kitchen light bulb might seem straightforward, but it can become a puzzling task if you’re unsure of where to start. Imagine transforming your kitchen into a well-lit, vibrant space with just a simple change. This guide is here to empower you, step by step, ensuring you replace your kitchen light bulb safely and effortlessly.
By the end of this article, not only will you be able to tackle this task with confidence, but you’ll also enjoy the satisfaction of a well-illuminated kitchen that makes every meal preparation a pleasure. Ready to brighten up your space? Let’s dive in!
How to Change Kitchen Light Bulb?
Turn off the power. Let the bulb cool. Use a sturdy step stool if needed. Twist the old bulb counterclockwise to remove. Insert the new bulb by turning it clockwise. Ensure it’s secure. Turn the power back on and test the light. Use the correct bulb type and wattage.
Safety Precautions
Ensure safety by turning off the power before changing the kitchen light bulb. Use a sturdy ladder to reach the fixture comfortably. Handle the bulb gently to prevent breakage and injury.
Changing a kitchen light bulb might seem like a simple task, but ensuring your safety is crucial. A kitchen is full of appliances and gadgets, creating potential hazards. Taking the right precautions not only prevents accidents but also makes the process smoother and more efficient. Ever tried swapping out a bulb and found yourself on a wobbly chair? That’s exactly what we’re here to avoid.
Turn Off The Power
Before you even think of touching the bulb, make sure the power is off. Locate the switch and turn it off to prevent any electrical mishaps. If you’re unsure about which switch controls the light, flip the main circuit breaker for peace of mind.
Use Proper Tools
Avoid makeshift solutions like standing on wobbly chairs or using slippery gloves. A sturdy step stool can be your best friend in reaching high fixtures safely. If you don’t have one, borrow or invest in one. It pays off in the long run.
Check The Fixture
Before removing the bulb, inspect the fixture for any signs of damage. A loose or cracked fixture can pose risks beyond just a faulty bulb. If you notice anything out of the ordinary, it might be time to call in a professional.
Wear Safety Gear
Light bulbs can break easily, so wearing gloves can protect your hands from cuts. Opt for rubber gloves as they provide a better grip and won’t slip off like cloth ones. Have you ever had a bulb shatter unexpectedly? Safety gear can save you from a painful experience.
Ensure Adequate Lighting
It’s ironic to change a bulb in dim lighting, but it’s essential. Use a flashlight or a temporary lamp to illuminate your workspace. This reduces the risk of accidents and helps you see what you’re doing clearly.
Dispose Of The Old Bulb Properly
Don’t toss the old bulb in the trash without thought. Broken bulbs can puncture trash bags and cause injuries. Wrap it in paper or place it in a box for safer disposal. This small step can prevent big messes later.
Test The New Bulb
After installing the new bulb, turn the power back on and test it. Check if the light is functioning correctly and that no flickering occurs. If it doesn’t work, double-check your installation or consider if the bulb itself is faulty. Safety isn’t just about avoiding accidents; it’s about making the whole process stress-free. When you take precautions, you transform a mundane task into a simple, efficient routine. What safety measures do you take when handling electrical tasks?
:max_bytes(150000):strip_icc()/convert-ceiling-light-to-recessed-light-p2-1821561-09-d6f90af585b2482c91a3e18464d76070.jpg)
Credit: www.thespruce.com
Gather Necessary Tools
Gather tools like a ladder, new bulb, and gloves. Ensure safety with a sturdy ladder and protective gloves. Keep everything within easy reach to change the kitchen light bulb efficiently.
Changing a kitchen light bulb may seem like a simple task, but having the right tools can make all the difference between a smooth operation and a frustrating experience. Before diving into the task, it’s essential to gather all the necessary tools. This preparation ensures you won’t be scrambling to find an item halfway through the process. Plus, it keeps you focused and efficient, saving you time and effort.
1. Safety First: Gloves And Goggles
Safety should be your top priority when changing a light bulb. Have you ever dropped a bulb and watched it shatter everywhere? That’s why protective gloves and goggles are crucial. They safeguard your hands from accidental glass shards and protect your eyes from any unexpected debris.
2. Reliable Ladder Or Step Stool
A sturdy ladder or step stool is invaluable for reaching ceiling fixtures. How often have you tried balancing on a shaky stool only to wobble and worry about falling? Choose a reliable ladder that gives you stability and peace of mind. Ensure it’s tall enough to reach the fixture comfortably without stretching awkwardly.
3. Correct Bulb Type
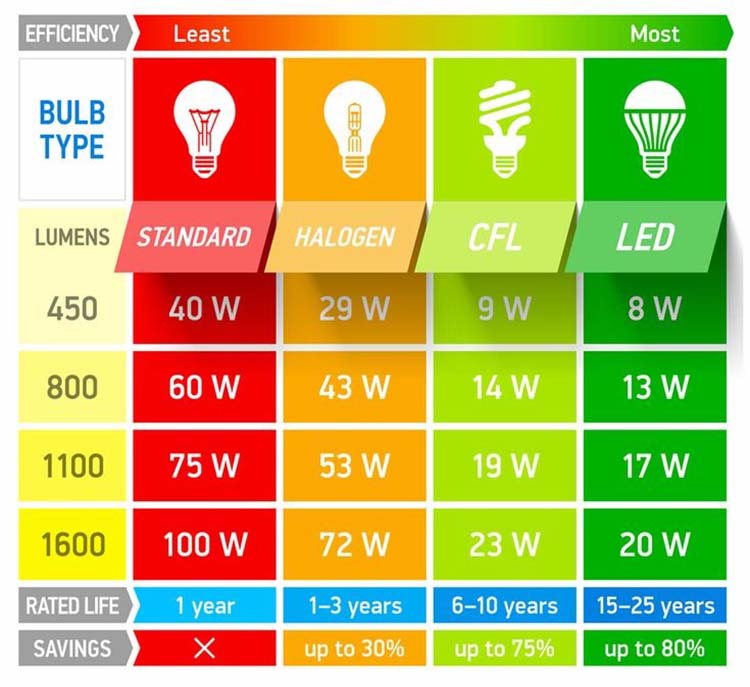
Not all bulbs are created equal. Have you ever bought the wrong bulb only to realize it doesn’t fit or match the ambiance? Confirm the type and wattage of the bulb you need before purchasing. Consider energy-saving options like LED bulbs to reduce electricity bills and extend the bulb’s lifespan.
4. Screwdriver Set
A screwdriver set might be necessary if the fixture has screws. Do you know how frustrating it is when you realize the screws are not standard size, and your tool doesn’t fit? Keep a versatile set handy to tackle any screw-related challenges easily.
5. Flashlight Or Headlamp
Ever tried changing a bulb in a dimly lit kitchen corner? A flashlight or headlamp provides the extra light you need. It’s particularly helpful if the main light is off and natural light is scarce. This tool ensures you see what you’re doing clearly, preventing mistakes.
6. Cleaning Supplies
Changing bulbs can reveal hidden dirt or dust. A quick wipe-down with cleaning supplies keeps your fixture looking fresh. Who doesn’t appreciate a clean, gleaming light fixture that adds sparkle to the kitchen? Taking a moment to gather these tools before you start can transform the process from a chore into a simple, efficient task. Do you have all these tools ready? It’s time to make your kitchen shine bright again!
Remove The Old Bulb
Changing a kitchen light bulb might seem simple. Yet, it requires careful steps. First, you need to remove the old bulb. This task involves safety and precision. Old bulbs can be tricky to handle. Follow this guide for a smooth process.
Turn Off The Power
Ensure the light switch is off. This prevents electric shock. Safety first, always.
Allow The Bulb To Cool
Wait for the bulb to cool. Hot bulbs can cause burns. Patience is key.
Get A Sturdy Ladder
Use a ladder to reach high fixtures. Stability prevents falls. Choose a sturdy one.
Use Protective Gloves
Wear gloves to protect your hands. Glass bulbs can break easily. Gloves offer safety.
Gently Unscrew The Bulb
Turn the bulb counterclockwise. Do it slowly to avoid breakage. A gentle approach works best.
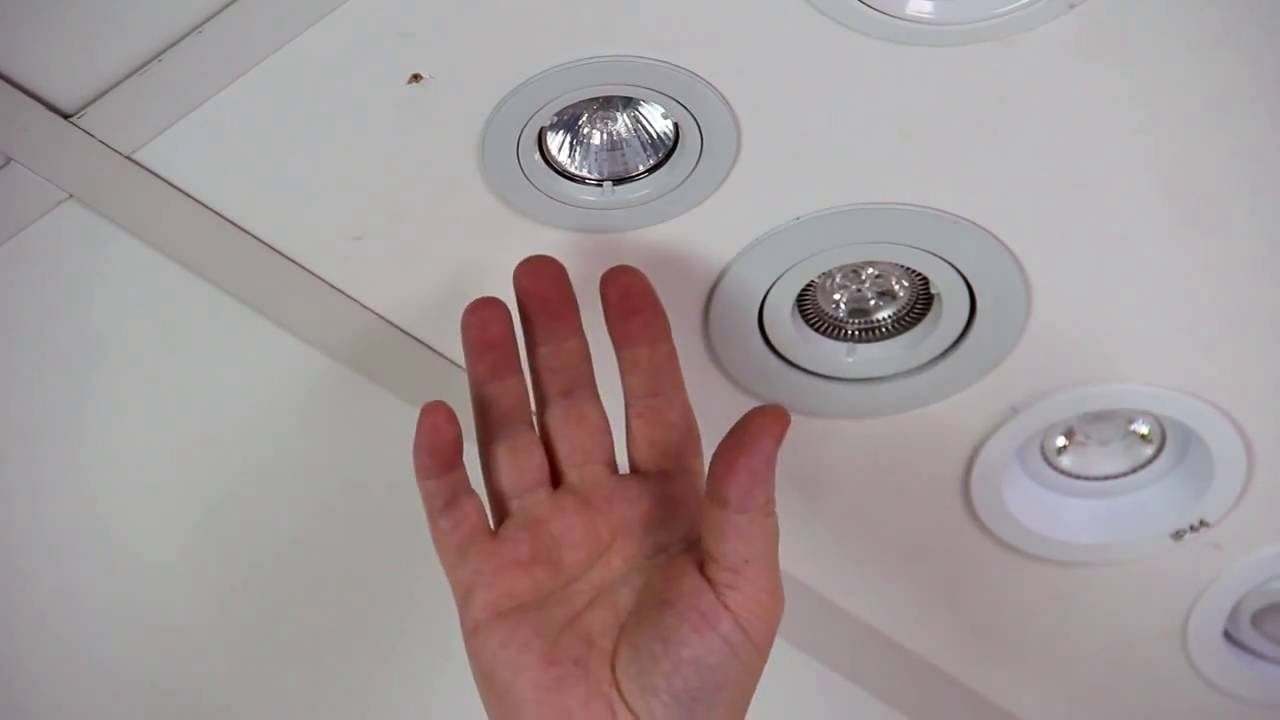
Check The Socket For Damage
Inspect the socket after removal. Look for any signs of wear. Ensure it is safe for use.

Credit: www.youtube.com
Install The New Bulb
Switching a kitchen light bulb is simple. First, turn off the light switch for safety. Remove the old bulb by twisting it counterclockwise. Insert the new bulb and twist clockwise until secure. Make sure the bulb is snug. Finally, turn on the switch to test your new bulb.
Changing a kitchen light bulb might seem straightforward, but the installation phase is crucial. It’s the moment when your new bulb transforms the space, offering the perfect lighting for cooking, dining, and family gatherings. Have you ever installed a bulb and found it flickering? Let’s ensure your new bulb shines brightly with these tips.
How To Handle The Bulb Safely
First things first: make sure your hands are dry. A wet grip could mean a slippery bulb. You don’t want it to slip and break, or worse, cause an electrical mishap. Check the bulb’s packaging for any specific handling instructions. Some bulbs are more delicate than others.
Connecting The Bulb Securely
Align the base of the bulb with the socket. Gently twist it clockwise until snug. Over-tightening can break the bulb or damage the socket. If you’re using an LED bulb, ensure it sits firmly. A loose bulb can lead to flickering or failure.
Testing The New Installation
Switch the light on. Does it illuminate the room evenly? If not, double-check the bulb placement. Observe for any flickering or unusual noise. These can signal improper installation or a faulty bulb.
Maintaining Your New Bulb’s Efficiency
Regularly clean the bulb and fixture to maximize brightness. Dust can dim the light and affect performance. Consider setting up a reminder to check your bulbs every few months. This helps avoid sudden outages. Changing a light bulb may seem mundane, but it’s an opportunity to improve your kitchen atmosphere. Have you noticed how the right light can change the mood of a room? By following these steps, you’re not just installing a bulb; you’re enhancing your home experience.
Test The New Light
Changing a kitchen light bulb is simple. Start by turning off the power. Unscrew the old bulb, then fit the new one securely. Test the new light to ensure proper installation.
Changing a kitchen light bulb might seem straightforward, but testing the new light is crucial to ensure it’s working properly and to avoid any future hassles. You’ve gone through the effort to replace the bulb, now it’s time to see if your kitchen is illuminated as expected. Let’s dive into the steps to test your new light effectively, ensuring your kitchen is bright and ready for action.
Check For Secure Fitting
Make sure the bulb is properly seated in the socket. A loose bulb can flicker or fail to work altogether. When you twist the bulb into place, you should feel it snugly fit without forcing it.
Turn The Power Back On
Switch the power back on at the breaker if it was turned off for safety. This is a step where many people feel a wave of relief seeing their kitchen light up again. If your light doesn’t turn on, double-check that the bulb is tightly fitted.
Observe The Light Intensity
Does the light match the brightness you expect? It’s a good time to consider if a different bulb wattage might suit your kitchen better. Perhaps you want a warmer glow or a brighter workspace; testing gives you the chance to assess this.
Listen For Unusual Sounds
Sometimes, new bulbs make a faint buzzing noise. This can be a sign of an electrical issue or simply a characteristic of certain bulb types. If the sound persists, it may be worth exploring different bulb options.
Test Switch Functionality
Flip the switch a few times to test responsiveness. If there’s a delay or the light flickers, it might be an issue with the socket rather than the bulb. Ensuring smooth operation can prevent headaches down the road.
Consider The Environmental Impact
Now that your light is working, think about its energy efficiency. Energy-saving bulbs can reduce your bills and environmental footprint. You’ve already made the effort to change the bulb; why not make it count for the planet too?
Reflect On Your Experience
Changing a bulb can seem trivial, but it’s an essential task for maintaining a functional kitchen. How did it feel when the light finally turned on? Sometimes the simplest tasks bring the greatest satisfaction, especially when they enhance your daily life. Testing your new kitchen light bulb isn’t just about making sure it works; it’s an opportunity to evaluate your choices and ensure they fit your needs. What did you learn from the process?
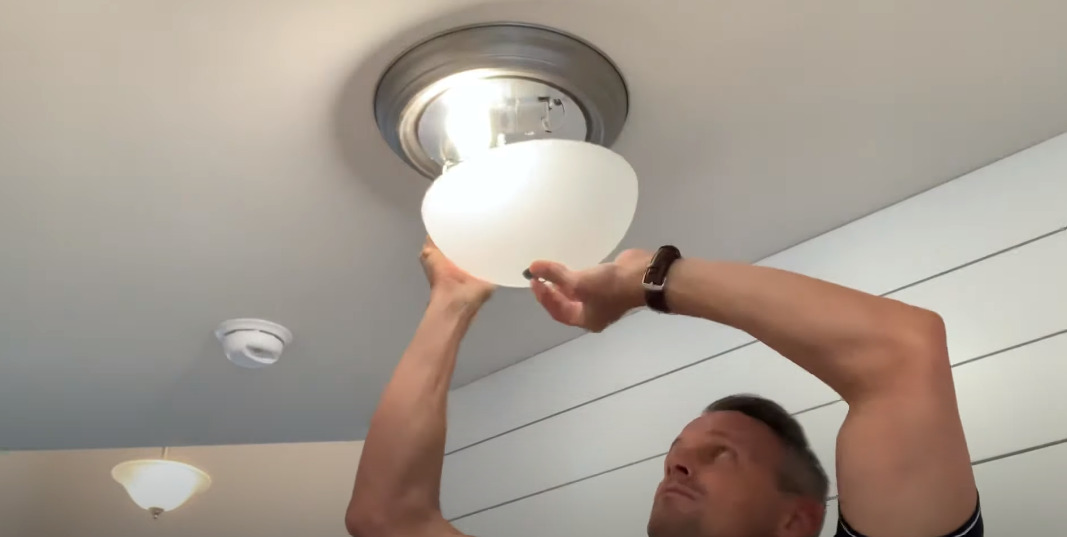
Credit: lightingshs.com
Frequently Asked Questions
How Do I Safely Change A Kitchen Light Bulb?
Turn off the light switch first. Wait for the bulb to cool. Use a sturdy step stool. Unscrew the bulb gently.
What Tools Are Needed To Change A Light Bulb?
Usually, no special tools are needed. Just a step stool for height. Gloves can protect your hands from heat.
Why Is My New Bulb Not Working?
Check if the bulb is screwed in tightly. Ensure the switch is on. Verify the bulb’s wattage matches the fixture.
Conclusion
Changing a kitchen light bulb is easy with the right steps. First, ensure safety by switching off the power. Then, remove the old bulb carefully. Choose the correct replacement bulb for your fixture. Install the new bulb by screwing it in firmly.
Turn on the power to test the new bulb. This simple process helps maintain a bright kitchen. Regular checks can prevent future issues. Always handle light bulbs with care to avoid breakage. Now, enjoy your well-lit kitchen space!
Related Article