How to Change a Bathroom Light Fixture? Easy DIY Guide
How to change a bathroom light fixture? Turn off power at the breaker. Remove the old fixture by unscrewing it and disconnecting wires. Match new fixture wires to wall wires—black to black, white to white, ground to ground. Secure connections with wire nuts. Attach the new fixture to the wall plate, install bulbs, and turn power back on.
Changing a bathroom light fixture is easier than you might think and can make a world of difference in your home. You don’t need to be an electrician to tackle this DIY project. With just a few tools and a bit of guidance, you can revamp your bathroom lighting in no time.
This guide will walk you through each step, empowering you to take control and create a space you love. Ready to shed some light on the process? Let’s get started!
How to Change a Bathroom Light Fixture?
Tools And Materials Needed
Gather a screwdriver, wire stripper, and voltage tester for the task. Ensure you have a new light fixture, wire nuts, and electrical tape handy for a smooth installation process.
Changing a bathroom light fixture can be a rewarding DIY project, giving your space a fresh look while saving on professional installation costs. However, before diving into this task, gathering the right tools and materials is crucial for a smooth process. Imagine standing on a ladder only to realize you’re missing a screwdriver. It’s frustrating! Preparing well can prevent such hiccups and make your project enjoyable and efficient.
Essential Tools For The Job
You’ll need a few basic tools that are likely already in your toolbox. Screwdrivers—both Phillips and flathead—are essential for removing the old fixture and installing the new one. A voltage tester is vital for safety, ensuring that no electrical current is running through the wires you’re about to handle. Consider using a wire stripper to cleanly remove any insulation from the wires. This ensures a secure connection when installing the new fixture. If you’ve ever struggled with stubborn wires, you’ll appreciate having this tool on hand.
Materials You Can’t Forget
Make sure you have electrical tape and wire nuts. These are crucial for safely securing the wire connections. Without them, you risk loose wires, which can lead to electrical problems. A ladder or sturdy step stool is indispensable for reaching ceiling fixtures comfortably. The right height ensures you can work safely without stretching awkwardly or risking a fall.
Safety Gear For Peace Of Mind
Safety should always be a priority. Wear safety goggles to protect your eyes from any falling debris or unexpected sparks. A pair of work gloves can protect your hands from sharp edges and provide a better grip on tools and materials.
Don’t Forget The Light Bulbs!
Once the fixture is installed, you’ll need the right bulbs to complete the job. Check the fixture’s specifications for bulb type and wattage to avoid any compatibility issues. Have you ever tried fitting a bulb only to realize it’s the wrong size? Being prepared with the right bulbs saves time and keeps your excitement intact when you see your new fixture glowing perfectly. — Armed with these tools and materials, you’re ready to tackle your bathroom light fixture project with confidence. What other projects have you considered that might require similar preparation?

Credit: m.youtube.com
Safety Precautions
Changing a bathroom light fixture is a simple DIY task. But, safety precautions are crucial. Without them, accidents can happen. Electricity can be dangerous. So, be careful. Below are essential safety measures.
Turn Off Power
Always switch off the power. Use the main circuit breaker. Double-check before starting. Electricity can cause serious injury. Safety first.
Test For Power
Ensure there’s no electrical current. Use a voltage tester. Check the wires thoroughly. This confirms the power is off. Avoid risks.
Wear Protective Gear
Wear safety glasses. Put on rubber gloves. These protect you from shocks. Also, wear sturdy shoes. Non-slip shoes are best.
Use Proper Tools
Gather the right tools. Use insulated screwdrivers. These prevent electric shocks. Ensure tools are in good condition. Damaged tools can be unsafe.
Secure Ladder Properly
Use a stable ladder. Place it on a flat surface. Ensure it’s secure. A shaky ladder is dangerous. Take caution when climbing.
Handle Light Fixture Carefully
Light fixtures are fragile. Handle them gently. Don’t rush the process. Avoid breaking glass. Safety is key.
Removing The Old Fixture
Begin by turning off the power to ensure safety. Carefully remove the old light fixture by unscrewing it. Disconnect the wires, noting their original positions. This prepares the area for installing the new bathroom light fixture securely.
Changing a bathroom light fixture can breathe new life into your space, brightening up your mornings and evenings. Removing the old fixture is an essential first step, and while it might sound daunting, it’s easier than you think with the right approach. Dive into this straightforward guide to safely and efficiently remove your outdated bathroom light fixture.
Turn Off The Power
Safety is your top priority. Head to your home’s electrical panel and switch off the circuit breaker for your bathroom. Double-check by flipping the light switch to ensure the power is off. You don’t want any unexpected zaps while you work.
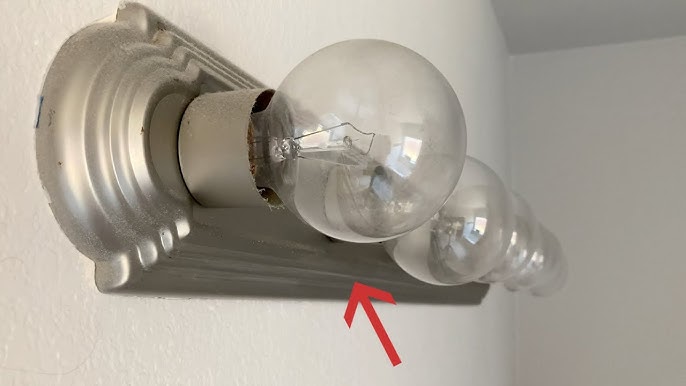
Remove The Light Bulbs
Take out any bulbs from the fixture. This step not only makes the fixture lighter but also prevents any accidental breakage. If you’re like me, you might find a forgotten energy-saving bulb—an unexpected bonus!
Unscrew The Fixture
Look for screws that hold the fixture to the wall or ceiling. Use a screwdriver to carefully remove these screws. As you do this, support the fixture with your other hand to prevent it from falling.
Detach The Fixture From The Wall
Gently pull the fixture away from the wall. You’ll see wires connecting it to your home’s electrical system. If you’ve ever untangled headphones, you’re halfway there—just more important to do it right.
Disconnect The Wiring
Identify the wires—usually black, white, and green or copper. Unscrew the wire nuts and carefully separate the wires. You might find it helpful to snap a quick photo before disconnecting, to remember which wire goes where later.
Inspect The Junction Box
With the fixture removed, examine the junction box. Ensure it’s in good condition and properly secured to the wall. This is crucial for safely installing your new fixture. Removing an old bathroom light fixture is a straightforward process that sets the stage for a fresh update. Have you ever tackled a home project and discovered something unexpected? Share your story and inspire others to take the first step in their own DIY adventures!

Credit: diy.stackexchange.com
Installing The New Fixture
Switching out a bathroom light fixture involves basic steps. First, turn off the power. Then, remove the old fixture carefully. Next, connect the new fixture’s wires. Secure it to the ceiling. Finally, switch the power back on to enjoy your updated lighting.
Installing a new bathroom light fixture might seem daunting, but it can be straightforward with the right guidance. Whether you’re upgrading for aesthetics or functionality, swapping out an old fixture for a new one is a rewarding DIY project. Let’s dive into the step-by-step process to get your bathroom shining bright with a fresh fixture.
Prepare The Area
Before you start, ensure the power to the bathroom is turned off at the breaker. This is crucial for your safety. Lay down a towel or cloth on the sink or floor to catch any falling screws or parts. Have your tools ready—typically, a screwdriver and pliers will do the trick.
Remove The Old Fixture
Carefully unscrew the old fixture from the wall or ceiling. Hold onto it firmly to prevent it from dropping. As you remove it, you’ll likely see wires connected to the fixture. Make a mental note or take a picture of their arrangement. Disconnect them gently, ensuring the ends don’t fray.
Connect Wires To The New Fixture
Match the wires from your new fixture to the wires coming out of the wall. Usually, black or red is hot, white is neutral, and green or bare is ground. Twist the corresponding wires together and secure them with wire nuts. Ensure a snug fit to prevent any loose connections.
Secure The Fixture In Place
Once the wires are connected, align the fixture with the mounting bracket on the wall or ceiling. Carefully screw it into place, making sure it’s stable. This step might require some patience, as aligning holes can be tricky. Remember, a firm fixture prevents future issues.
Test The Fixture
Turn the power back on and test your new light fixture. If it doesn’t light up, double-check the wiring connections. Sometimes, a small oversight can cause a big inconvenience. Once it’s working, take a step back and admire your handiwork. Have you ever thought about how a simple change like this can transform a space? A new light fixture not only brightens up the room but also adds a touch of personal style. Ready to tackle your next DIY project?
Testing And Final Touches
Ensure the new light fixture works correctly by testing it. Adjust any loose components for a perfect fit. Confirm the light switch functions smoothly, providing reliable illumination in your bathroom.
Changing a bathroom light fixture can seem daunting, but the final steps—testing and adding the finishing touches—are crucial. You’ve done most of the hard work, and now it’s about ensuring everything is safe and looks great. Let’s dive into how you can confidently complete this project.
Testing The New Fixture
Before you admire your handiwork, ensure the light works as it should. Turn on the power at the circuit breaker. Flip the light switch to see if your new fixture illuminates the bathroom. If it doesn’t, double-check your wiring connections. Loose wires could be the culprit. Make sure each wire is snugly connected, and all wire nuts are secured. Testing is your opportunity to catch any errors and fix them before calling the job done.
Inspecting For Safety
Safety is non-negotiable. Check that all screws are tight and the fixture is firmly attached to the ceiling or wall. A wobbly fixture not only looks unprofessional but can also be a safety hazard. Ensure that there are no exposed wires. All connections should be neatly tucked away. If something seems amiss, don’t hesitate to consult a professional. Your safety is worth it.
Adding The Final Touches
Once the light is working and safe, it’s time for the finishing touches. This is where you can personalize your space. Consider adding stylish bulbs that match your bathroom’s aesthetic. If your fixture came with a decorative cover or shade, ensure it’s securely fastened. Clean any fingerprints or smudges from the installation process. Stand back and admire your work—your bathroom now has a refreshed look.
Evaluating Your Work
Take a moment to evaluate the overall effect. Does the light illuminate the bathroom as you imagined? If it’s too dim or harsh, consider swapping the bulbs for a different wattage or color temperature. Your bathroom lighting should complement the space. Think about how you feel in the newly lit room. Does it make your morning routine easier? Does it create a relaxing ambiance for evening baths?
Sharing Your Experience
Changing a light fixture is no small feat. Share your success with friends or on social media. Your experience might inspire someone else to tackle a home project. How does it feel to look at the fixture and know you installed it? Is there anything you would do differently next time? Reflecting on the process can provide valuable insights for your future DIY endeavors. Now that you’ve changed your bathroom light fixture, what’s next on your home improvement list?
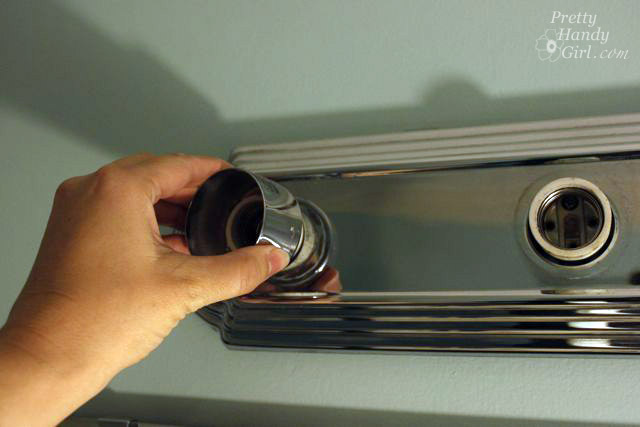
Credit: prettyhandygirl.com
Frequently Asked Questions
What Tools Do I Need To Change A Bathroom Light Fixture?
You need a screwdriver, wire stripper, and voltage tester. These tools help safely remove and install fixtures.
Is It Safe To Change A Bathroom Light Fixture By Myself?
Yes, but ensure the electricity is off. Always double-check with a voltage tester before touching wires.
How Long Does It Take To Replace A Bathroom Light Fixture?
It usually takes about 30 minutes. Complex fixtures might take longer, depending on the wiring and mount.
Conclusion
Changing a bathroom light fixture can seem daunting. But with patience, it’s manageable. Gather your tools and safety gear first. Then, turn off the power. Carefully remove the old fixture. Follow by connecting the wires correctly. Secure the new fixture in place.
Finally, turn the power back on. Test the new light to ensure it works. With these simple steps, your bathroom can have a fresh look. Remember to always prioritize safety. Take your time and enjoy your updated space.
Related Article