How to Change a Kitchen Light? Quick & Easy Guide
How to change a kitchen light? Turn off the power at the breaker. Remove the old fixture by unscrewing it and disconnecting wires. Match and connect the new fixture’s wires (black to black, white to white, ground to ground). Secure the fixture to the ceiling, add bulbs, then restore power and test the light.
Many people underestimate the impact good lighting can have in their kitchen space. Imagine transforming your kitchen with a simple change that enhances visibility and adds a touch of style. Changing a kitchen light might sound daunting, but with a few simple steps, you can do it yourself without the hassle of hiring a professional.
Whether you’re looking to upgrade your lighting fixture or simply replace a bulb, this guide will walk you through the process, ensuring you achieve the perfect lighting solution. So, roll up your sleeves and discover how easy it is to brighten up your kitchen!

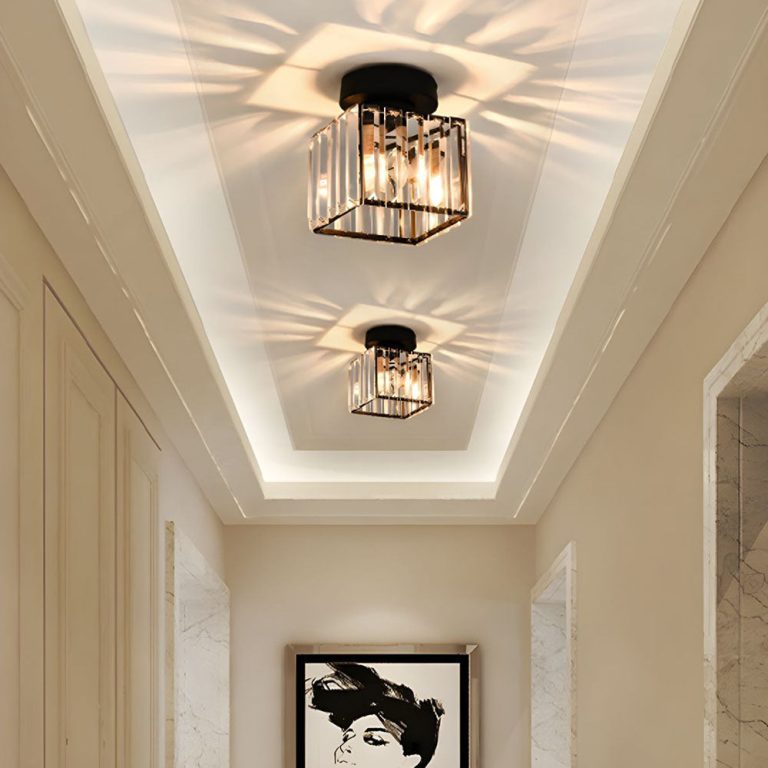
Credit: www.reddit.com
How to Change a Kitchen Light?
Gather Necessary Tools
Before changing a kitchen light, gather tools like a screwdriver, ladder, and safety goggles. Having everything ready ensures a smooth process and keeps you safe.
Changing a kitchen light may seem daunting, but with the right preparation, it’s a straightforward task. Before diving into the actual replacement, gathering the necessary tools is crucial. You wouldn’t want to be halfway through the job only to realize you’re missing a screwdriver, right? Ensuring you have everything ready not only saves time but also makes the process smoother and safer.
1. Safety First: Turn Off The Power
Before you start gathering tools, make sure the power to the kitchen light is turned off. This step is non-negotiable, as it prevents electrical shock. Find your circuit breaker and switch off the power to the kitchen.
2. Basic Tools You Will Need
You’ll need a few basic tools to change your kitchen light. A Phillips head screwdriver is essential, as most light fixtures are secured with screws. Additionally, a flat-head screwdriver might come in handy for prying open stuck covers or removing stubborn screws.
3. Ladder Or Step Stool
Kitchen ceilings can be quite high, so a stable ladder or step stool is necessary for reaching the fixture safely. Make sure it’s sturdy and positioned on a flat surface to prevent any accidents.
4. Light Bulbs And Fixture Parts
If you’re changing the entire fixture, have the new light fixture ready along with any necessary parts. For bulb replacement, ensure you have the correct wattage and type for your kitchen light. LED bulbs are a popular choice due to their energy efficiency and long lifespan.
5. Optional: Voltage Tester
While turning off the power should suffice, a voltage tester offers extra peace of mind. It helps confirm that no electricity is flowing through the wires, ensuring your safety during the replacement process.
6. Personal Safety Gear
Consider wearing safety goggles to protect your eyes from dust or debris. Gloves can also help prevent cuts and provide a better grip, especially if you’re dealing with fragile glass components. Have you ever started a project only to realize you’re missing a key tool? It can be frustrating, right? By checking off each item from this list, you’ll avoid such pitfalls and be well-prepared to tackle your kitchen light change with confidence.
Turn Off Power
Before changing a kitchen light, ensure safety by turning off the power. This prevents electrical hazards and accidents. Always double-check that the light switch is off.
Changing a kitchen light can seem daunting, but it’s surprisingly straightforward with the right guidance. Before diving into the process, one crucial step ensures your safety: turning off the power. This might sound simple, but it’s where many people make mistakes. It’s more than just flipping a switch. You need to make sure the power is completely off to avoid electrical shocks.
Check Your Circuit Breaker
First, head to your circuit breaker panel. This is typically found in a garage, basement, or utility room. Identify the switch corresponding to your kitchen’s lights and turn it off. If you’re unsure, turning off the main switch ensures safety, but remember it will cut power to your whole house.
Test The Power
Once the breaker is off, don’t assume it’s safe just yet. Use a voltage tester or a simple lamp to check if the power is truly off. Plug the lamp into outlets in the kitchen. If it doesn’t light up, you’re good to go. This small step can prevent big accidents.
Share Your Experience
Have you ever had a friend who skipped this step? I did. They thought flipping the wall switch was enough. It led to a frightening jolt and a lesson learned the hard way. Share your stories in the comments. What mistakes have taught you valuable lessons?
Safety First
Remember, safety always comes first. Even if you’re confident, double-checking is never a bad idea. Why risk it? You wouldn’t drive without checking your mirrors, so why change a light without checking the power? Turning off the power isn’t just a step; it’s the foundation for a safe and successful light change. Take it seriously, and your kitchen light project will proceed smoothly. Are you ready to tackle your kitchen light now?
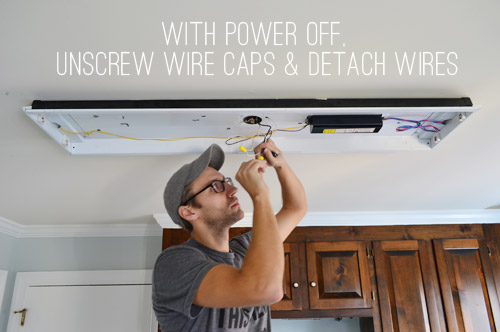
Remove The Old Fixture
Changing a kitchen light can brighten up the entire space. The first step is to remove the old fixture. Doing this carefully ensures safety and prepares the area for the new light. Let’s break down the process into manageable steps.
Ensure safety by turning off the power at the circuit breaker. Test the light switch to confirm the power is off. This prevents electrical shock and keeps you safe.
Remove Light Bulbs
Unscrew and remove all light bulbs from the fixture. Place them in a safe spot to avoid breakage. This reduces the fixture’s weight, making it easier to handle.
Detach Fixture Cover
Locate screws or clips securing the fixture cover. Use a screwdriver to gently remove them. Lift the cover carefully and set it aside.
Unscrew The Fixture
Identify screws holding the fixture base to the ceiling. Carefully unscrew these with a screwdriver. Support the fixture with one hand to prevent it from falling.
Disconnect Wires
Notice the wires connecting the fixture to the ceiling. Twist off the wire connectors to release the wires. Note the wire colors for easy reconnection later.
Remove Old Fixture
Gently pull the fixture away from the ceiling. Check for any remaining screws or wires. Once free, set the fixture aside.
Credit: www.younghouselove.com
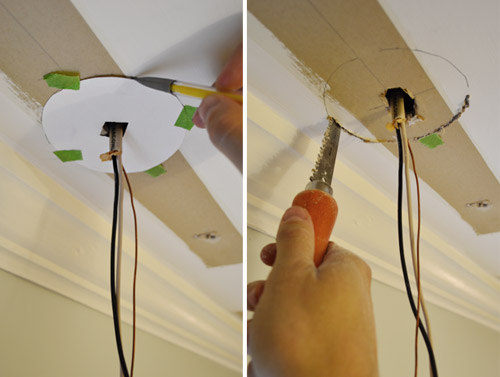
Install The New Light
Installing a new kitchen light can brighten up your space in no time. It’s a task that many homeowners can tackle themselves. With the right tools and a little patience, you can update your kitchen’s look. Before you start, ensure safety by turning off the power supply. Gather necessary tools and keep your new light fixture ready. Let’s walk through the steps to install your new kitchen light.
Preparing The New Fixture
First, unpack your new light fixture carefully. Check the contents for any missing parts. Read the manufacturer’s instructions thoroughly. This ensures you understand the assembly process clearly. Lay out all components on a clean surface. This helps you access them easily during installation.
Attaching The Mounting Bracket
Find the mounting bracket in your fixture box. Use a screwdriver to attach it to the junction box. Make sure it’s securely fastened. This will hold the light fixture in place. Double-check the alignment to ensure it’s straight. A level bracket ensures a stable fixture.
Connecting The Wiring
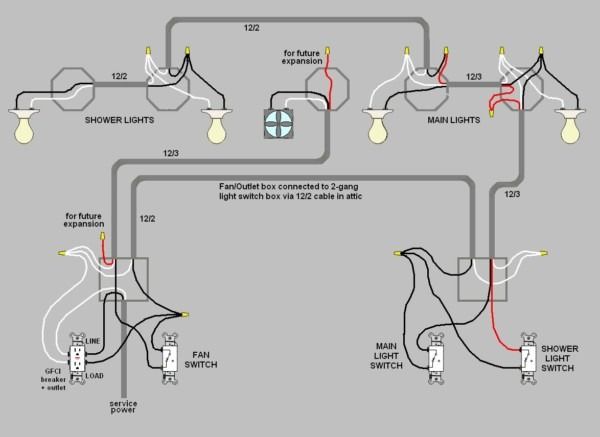
Match the wires from the fixture to those in your junction box. Typically, black connects to black and white to white. Use wire connectors to secure these connections. Twist the connectors tightly to prevent loose wires. If there’s a ground wire, attach it to the ground screw. Be cautious to avoid mixing wires.
Securing The Fixture
Lift the fixture and align it with the mounting bracket. Use screws or clips provided to secure it. Ensure the fixture sits evenly against the ceiling. Tighten all screws to prevent wobbling. Test the fixture’s stability by gently nudging it. A firm fixture is safe and looks professional.
Installing Bulbs And Covers
Place the appropriate bulbs into the fixture sockets. Check the wattage limits to avoid overheating. Attach any covers or shades that came with the fixture. Ensure they fit snugly and securely. These components complete the fixture’s look. They also help diffuse light evenly across your kitchen.
Testing Your New Light
Turn the power supply back on. Switch on your new kitchen light. Observe its brightness and placement. Make any necessary adjustments for optimal lighting. Enjoy the fresh ambiance your new light brings to your kitchen.
Restore Power And Test
After installing the new kitchen light, the next step is crucial. Restoring power and testing the light ensures everything works properly. This step confirms the safety and efficiency of your installation. Follow these simple instructions to complete this process seamlessly.
Restore Power To The Circuit
Begin by returning to the electrical panel. Locate the circuit breaker you turned off earlier. Switch it back to the ‘ON’ position. This action restores power to the kitchen light circuit. Make sure the breaker is firmly switched to avoid flickering lights.
Test The New Kitchen Light
Head back to the kitchen. Flip the light switch to test your new fixture. Observe the brightness and stability of the light. If it’s steady, your installation is successful. A flickering light might signal a loose connection. Double-check your wiring if issues arise.
Check For Any Issues
Ensure the light bulb is properly secured. Verify if the fixture is mounted correctly. Listen for unusual sounds. Any buzzing or humming indicates a potential problem. Always prioritize safety and perform checks diligently.
Final Inspection
Look around your kitchen for any abnormalities. Ensure the light illuminates the space adequately. Confirm there are no sparks or smoke. Successful testing means your kitchen is ready to use. Enjoy the improved lighting ambiance.

Credit: www.reddit.com
Frequently Asked Questions
What Tools Do You Need To Change A Kitchen Light?
You need a ladder, screwdriver, and new bulb. Have safety gloves ready. Always turn off power first.
How Do You Safely Remove The Old Light Fixture?
Turn off electricity at the breaker. Unscrew fixture. Carefully disconnect wires. Use ladder for support.
Can You Change A Kitchen Light Without An Electrician?
Yes. Follow safety steps. Ensure power is off. Be cautious with wires and connections.
Conclusion
Changing a kitchen light is simple with the right steps. First, turn off the power. Next, remove the old fixture carefully. Then, connect the new light’s wires. Ensure they match the old ones. Secure the fixture in place tightly. Finally, turn the power back on to test.
If it lights up, you’ve succeeded. This task can be done in an afternoon. Remember, always prioritize safety. Use proper tools and follow instructions closely. With these tips, your kitchen will shine brightly again.
Related Article